Proxmox VE 常用命令整理
Proxmox VE 常用命令整理
狂犬主子Proxmox VE(PVE)常用命令整理
个人对虚拟化部署 All in BOOM HomeLab Server 有需求,试过 ESXi、unRaid、Proxmox VE 等方案,认为 ESXi、PVE 这两款比较符合我的要求,前者适合专业的服务器使用,个人 PC 还是推荐基于 Debian 的后者。由于本人没有专业服务器,ESXi 比较吃我内存,故转投 PVE
由于PVE许多功能无法在Web UI中完成设置,需要使用一些命令、修改一些配置文件,本人记性又不太好。俗话说“好记性不如烂笔头”,故整理出本笔记供后续查看,本博客也重点更新此文章,如有需要请收藏
具体ESXi、PVE、unRaid的对比参考:https://zhuanlan.zhihu.com/p/166352130
学习PVE推荐博客(PVE的瑞士军刀):https://foxi.buduanwang.vip/
注意:本文大多数内容基于PVE7编写,和其它版本会有些出入,请悉知!
一、安装升级
关于系统安装,属于是有手就行的操作,故不在赘述。
(非必须)安装PVETools
1 | export LC_ALL=en_US.UTF-8 apt update && apt -y install git && git clone https://github.com/ivanhao/pvetools.git cd pvetools ./pvetools.sh |
1、国内源设置
删除企业源:
1 | rm -rf /etc/apt/sources.list.d/pve-enterprise.list rm -rf /etc/apt/sources.list.d/ceph.list |
设置国内源:注意分版本
展开查看PVE7专用命令
仅适用于PVE7,其它版本请勿乱用!!!
编辑镜像源:
先备份一下再修改
1 | cp /etc/apt/sources.list /etc/apt/sources.list.bak |
1 | nano /etc/apt/sources.list |
中科大源(移动速度快):
1 | deb http://mirrors.ustc.edu.cn/debian/ bullseye main contrib non-free deb http://mirrors.ustc.edu.cn/debian/ bullseye-updates main contrib non-free deb http://mirrors.ustc.edu.cn/debian/ bullseye-backports main contrib non-free deb http://mirrors.ustc.edu.cn/debian-security bullseye-security main contrib deb http://mirrors.ustc.edu.cn/proxmox/debian bullseye pve-no-subscription #deb http://mirrors.ustc.edu.cn/proxmox/debian/ceph-pacific bullseye main |
一键操作——中科大源:
1 | cat <<'EOF' > /etc/apt/sources.list deb http://mirrors.ustc.edu.cn/debian/ bullseye main contrib non-free deb http://mirrors.ustc.edu.cn/debian/ bullseye-updates main contrib non-free deb http://mirrors.ustc.edu.cn/debian/ bullseye-backports main contrib non-free deb http://mirrors.ustc.edu.cn/debian-security bullseye-security main contrib deb http://mirrors.ustc.edu.cn/proxmox/debian bullseye pve-no-subscription #deb http://mirrors.ustc.edu.cn/proxmox/debian/ceph-pacific bullseye main EOF |
展开查看PVE通用命令
一键操作——中科大源:
1 | # 修改基础系统(Debian)的源文件: sed -i 's|^deb http://ftp.debian.org|deb https://mirrors.ustc.edu.cn|g' /etc/apt/sources.list sed -i 's|^deb http://security.debian.org|deb https://mirrors.ustc.edu.cn/debian-security|g' /etc/apt/sources.list # 修改 Proxmox 的源文件 source /etc/os-release echo "deb https://mirrors.ustc.edu.cn/proxmox/debian/pve $VERSION_CODENAME pve-no-subscription" > /etc/apt/sources.list.d/pve-no-subscription.list |
对于 Proxmox Backup Server 和 Proxmox Mail Gateway,请将以上命令中的 pve 分别替换为 pbs 和 pmg。
2、升级系统
更新软件包数据库缓存:
1 | apt update |
升级系统软件包:
1 | apt upgrade -y |
(可选,建议)安装vim代替难用的vi:
1 | apt install vim -y |
(可选,建议)安装 linux 6.2 内核代替 PVE7 (debian 11) 难用的 5.15 内核:
1 | apt install pve-kernel-6.2 -y |
注意:PVE8 已默认 linux 6.2 内核!
3、替换 CT 模板源
1 | cp /usr/share/perl5/PVE/APLInfo.pm /usr/share/perl5/PVE/APLInfo.pm_back sed -i 's|http://download.proxmox.com|http://mirrors.ustc.edu.cn/proxmox|g' /usr/share/perl5/PVE/APLInfo.pm systemctl restart pvedaemon |
4、删除订阅弹窗提醒
PVE 9:以下方法来自 https://mp.weixin.qq.com/s/UHb09Zi-ZTKyeezMCtZyHg
1 | cp /usr/share/javascript/proxmox-widget-toolkit/proxmoxlib.js /usr/share/javascript/proxmox-widget-toolkit/proxmoxlib.js.bak line_num=$(grep -n "res.data.status.toLowerCase() !== 'active'" /usr/share/javascript/proxmox-widget-toolkit/proxmoxlib.js | head -1 | cut -d: -f1) sed -i "${line_num}s/!==/===/" /usr/share/javascript/proxmox-widget-toolkit/proxmoxlib.js systemctl restart pveproxy |
PVE 7/8:
1 | sed -i.bak "s/data.status.toLowerCase() !== 'active'/false/g" /usr/share/javascript/proxmox-widget-toolkit/proxmoxlib.js |
二、磁盘管理
1、查看分区结构
1 | fdisk -l lvs cat /etc/pve/storage.cfg |
1 | root@pve:~# fdisk -l Disk /dev/nvme0n1: 465.76 GiB, 500107862016 bytes, 976773168 sectors Disk model: Asgard AN2 500NVMe-M.2/80 Units: sectors of 1 * 512 = 512 bytes Sector size (logical/physical): 512 bytes / 512 bytes I/O size (minimum/optimal): 512 bytes / 512 bytes Disklabel type: gpt Disk identifier: 6F4A00AC-F4C9-4352-A8D4-63148EC21292 Device Start End Sectors Size Type /dev/nvme0n1p1 34 2047 2014 1007K BIOS boot /dev/nvme0n1p2 2048 2099199 2097152 1G EFI System /dev/nvme0n1p3 2099200 976773134 974673935 464.8G Linux LVM Disk /dev/mapper/pve-swap: 7.62 GiB, 8183087104 bytes, 15982592 sectors Units: sectors of 1 * 512 = 512 bytes Sector size (logical/physical): 512 bytes / 512 bytes I/O size (minimum/optimal): 512 bytes / 512 bytes Disk /dev/mapper/pve-root: 96 GiB, 103079215104 bytes, 201326592 sectors Units: sectors of 1 * 512 = 512 bytes Sector size (logical/physical): 512 bytes / 512 bytes I/O size (minimum/optimal): 512 bytes / 512 bytes root@pve:~# lvs LV VG Attr LSize Pool Origin Data% Meta% Move Log Cpy%Sync Convert data pve twi-a-tz-- 338.23g 0.00 0.50 root pve -wi-ao---- 96.00g swap pve -wi-ao---- 7.62g root@pve:~# cat /etc/pve/storage.cfg dir: local path /var/lib/vz content iso,vztmpl,backup lvmthin: local-lvm thinpool data vgname pve content rootdir,images |
2、扩展根目录
在虚拟机配置栏,选择磁盘,点击移动磁盘到其他磁盘
使用命令删除lvm-thin:
1 | lvremove /dev/pve/data |
将lvm-thin的空间转移到pve-root:
1 | lvextend -rl +100%FREE /dev/pve/root |
使用df -h查看,根目录已经扩大:
1 | root@pve:~# df -h Filesystem Size Used Avail Use% Mounted on udev 3.8G 0 3.8G 0% /dev tmpfs 781M 1.2M 780M 1% /run /dev/mapper/pve-root 450G 3.7G 427G 1% / tmpfs 3.9G 25M 3.8G 1% /dev/shm tmpfs 5.0M 0 5.0M 0% /run/lock /dev/nvme0n1p2 1022M 344K 1022M 1% /boot/efi /dev/fuse 128M 16K 128M 1% /etc/pve tmpfs 781M 0 781M 0% /run/user/0 |
在网页上,删除lvm-thin:


进入目录/var/lib/vz查看所有内容:
1 | ls /var/lib/vz/ |
1 | root@pve:~# ls /var/lib/vz/ dump images private snippets template |
三、硬件直通
1、开启 IOMMU 支持
编辑 grub 配置文件中,Linux 内核的启动参数:
1 | vim /etc/default/grub |
找到:
GRUB_CMDLINE_LINUX_DEFAULT=“quiet”
Intel CPU改为:
GRUB_CMDLINE_LINUX_DEFAULT=“quiet intel_iommu=on iommu=pt”
如需GVT-g改为:
GRUB_CMDLINE_LINUX_DEFAULT=“quiet intel_iommu=on iommu=pt i915.enable_gvt=1”
开启ACS改为:
GRUB_CMDLINE_LINUX_DEFAULT=“quiet intel_iommu=on iommu=pt pcie_acs_override=downstream”
AMD CPU改为:
GRUB_CMDLINE_LINUX_DEFAULT=“quiet amd_iommu=on iommu=pt pcie_acs_override=downstream”
显卡直通加上video=vesafb:off video=efifb:off video=simplefb:off,目的是屏蔽显卡,加了之后,启动进内核后停留在一个画面,如需使用钩子、安装GUI请勿添加,通常无需添加!
GRUB_CMDLINE_LINUX_DEFAULT=“quiet intel_iommu=on iommu=pt video=vesafb:off video=efifb:off video=simplefb:off pcie_acs_override=downstream”
最全(不用改modprobe):
GRUB_CMDLINE_LINUX_DEFAULT=“quiet intel_iommu=on iommu=pt pcie_acs_override=downstream,multifunction initcall_blacklist=sysfb_init video=simplefb:off video=vesafb:off video=efifb:off video=vesa:off disable_vga=1 vfio_iommu_type1.allow_unsafe_interrupts=1 kvm.ignore_msrs=1 modprobe.blacklist=radeon,nouveau,nvidia,nvidiafb,nvidia-gpu,snd_hda_intel,snd_hda_codec_hdmi,i915”
说明:
- IOMMU (I/O Memory Management Unit)中断重新映射。如果不中断重新映射,将无法使用 PCI 直通。设备分配将失败,并显示“无法分配设备”[设备名称]“:不允许操作”或“找不到中断重新映射硬件,将设备传递到非特权域不安全”错误。【 ‘Failed to assign device “[device name]”: Operation not permitted’ or ‘Interrupt Remapping hardware not found, passing devices to unprivileged domains is insecure.’ error.】 所有使用英特尔处理器和芯片组的系统,如果支持英特尔虚拟化技术定向 I/O (VT-d),但不支持中断重新映射,将看到此类错误。较新的处理器和芯片组(AMD 和英特尔)提供中断重新映射支持;
- PCIe直通需要主要主要开启虚拟化, Intel叫VT-d,AMD的叫AMD-V(i) ,都需要再主板BIOS里面开启;
- Intel添加的为
intel_iommu=on,AMD添加的为amd_iommu=on; iommu=pt:这仅在必要时才启用 IOMMU 转换,适配器不需要使用 DMA 转换到内存,因此可以提高虚拟机管理程序 PCIe 设备(未传递到 VM)的性能。意思就是开了能提高虚拟机调取PCIe的性能,那就开吧。i915.enable_gvt=1:Intel的 GVT-g 驱动程序集成在内核中,启用时加载模块。意思就是,想开启GVT-g的就添加这条,显卡直通的就不要添加了。
2、增加驱动黑名单
如果使用vGPU、Gvt-G、使用钩子、安装GUI请勿添加,通常无需添加!
Intel显卡:
1 | echo "blacklist snd_hda_intel" >> /etc/modprobe.d/blacklist.conf echo "blacklist snd_hda_codec_hdmi" >> /etc/modprobe.d/blacklist.conf echo "blacklist i915" >> /etc/modprobe.d/blacklist.conf |
AMD显卡:
1 | echo "blacklist radeon" >> /etc/modprobe.d/blacklist.conf echo "blacklist amdgpu" >> /etc/modprobe.d/blacklist.conf |
NVIDIA显卡:
1 | echo "blacklist nouveau" >> /etc/modprobe.d/blacklist.conf echo "blacklist nvidia" >> /etc/modprobe.d/blacklist.conf echo "blacklist nvidiafb" >> /etc/modprobe.d/blacklist.conf |
解决增加PCI设备后虚拟机无法启动
1 | echo "options vfio_iommu_type1 allow_unsafe_interrupts=1" >> /etc/modprobe.d/pve-blacklist.conf |
3、绑定vfio
通常无需执行此步骤!
查看自己的显卡、声卡的PCI地址、did和vid
1 | lspci -nn |
root@pve:~# lspci -nn
…
00:02.0 VGA compatible controller [0300]: Intel Corporation HD Graphics 530 [8086:1912] (rev 06)
…
00:1f.3 Audio device [0403]: Intel Corporation 100 Series/C230 Series Chipset Family HD Audio Controller [8086:a170] (rev 31)
…
可以看到,显卡的PCI地址为00:02.0,did和vid为8086:1912,声卡以此类推
执行命令增加vfio-pci选项
1 | echo "options vfio-pci ids=8086:1912,8086:a170" > /etc/modprobe.d/vfio.conf |
注意:上面这条命令,ids=后面跟直通组的所有设备,中间以英文逗号隔开,自己的设备需要自己替换,请勿照抄
检查配置
上述操作完成之后,再检查一下,是否将例子内容替换成自己的
使用以下命令查看:
1 | cat /etc/modprobe.d/blacklist.conf cat /etc/modprobe.d/vfio.conf |
blacklist radeon
blacklist amdgpu
blacklist snd_hda_intel
blacklist snd_hda_codec_hdmi
blacklist i915
options vfio-pci ids=8086:1912,8086:a170
4、加载相应的内核模块
1 | echo vfio >> /etc/modules echo vfio_iommu_type1 >> /etc/modules echo vfio_pci >> /etc/modules echo vfio_virqfd >> /etc/modules |
如需vGPU和GVT-g,还需:
1 | echo kvmgt >> /etc/modules |
对于Nvidia显卡,避免一些莫名其妙的错误,需要:
1 | echo "options kvm ignore_msrs=1" > /etc/modprobe.d/kvm.conf |
5、更新grub和内核
1 | update-grub update-initramfs -k all -u reboot |
验证是否开启iommu
1 | dmesg | grep -e DMAR -e IOMMU -e AMD-Vi |
出现如下例子,则代表成功:
…
[ 0.030895] DMAR: IOMMU enabled
…
[ 0.303716] DMAR: Intel® Virtualization Technology for Directed I/O
此时输入命令
1 | find /sys/kernel/iommu_groups/ -type l |
/sys/kernel/iommu_groups/7/devices/0000:00:1c.0
/sys/kernel/iommu_groups/5/devices/0000:00:17.0
/sys/kernel/iommu_groups/13/devices/0000:06:00.0
…
出现很多直通组,就代表成功
如果没有任何东西,就是没有开启,请检查主板BIOS VT-d设置和GRUB设置
如硬件设备不支持,可以使用以下命令允许不安全的中断:
echo "options vfio_iommu_type1 allow_unsafe_interrupts=1" > /etc/modprobe.d/iommu_unsafe_interrupts.conf
6、显卡直通直通
独显直通虚拟机
独显直通比较简单,直接在网页里面配置,机型按需设置,如legacy boot就用SeaBIOS+i440fx,uefi boot就用OVMF+q35,装好系统,添加PCI设备,选择你的显卡,所有功能最好勾上,PCI-Express勾不勾需要自行测试,i440fx无法勾选PCI-E,然后如果需要显卡显示到显示器,将虚拟机显示设为无,勾选主GPU
直通两张显卡可能会出现问题及解决方法:
https://www.wunote.cn/article/5288/
核显直通虚拟机
建议Intel 6代以上机器尝试
实测6代i5 6500完美直通,任何版本驱动均无问题
注意:
- **(重要)**核显是否支持虚拟化直通,请看这篇官方文档:
https://www.intel.cn/content/www/cn/zh/support/articles/000093216/graphics/processor-graphics.html - 根据上面的文章,简单概括为:
- 6-11 代支持 GVT-g (英特尔® Graphics Virtualization Technology –g)
- 12-14 代支持 SR-IOV(单根 IO 虚拟化)
- Ultra 1代支持 ATS
- Arc 和 11代笔记本 U 不支持虚拟化技术
- 直通后无法开启虚拟机,请检查配置有没有错误,在配置正确的情况下尝试更新、降级PVE Linux内核
- 直通给Windows虚拟机打上驱动后出现黑屏、花屏等问题,最好试试Linux,因为有时候是显卡的Windows驱动导致的
Linux下查看显卡信息:
1 | ls /dev/dri |
方案1-UDT直通(不推荐)
适用于5代以上的CPU核显
如果你的VMID是123,那么命令应该是
1 | qm set 123 -args "-device vfio-pci,host=00:02.0,addr=0x18,x-vga=on,x-igd-opregion=on" |
如果你打算直通到群晖,需要在GUI面板上,将显卡设置成无,添加串口设备用于调试,同时将核显位置绑定到虚拟机的00:02位置,所以应该执行该命令
1 | qm set 123 -args "-device vfio-pci,host=00:02.0,addr=0x02,x-vga=on,x-igd-opregion=on" |
PVE下黑群晖核显直通无法开启硬解的解决方法
1 | qm set 123 -args "-device vfio-pci,host=00:02.0,addr=0x02,x-vga=on,x-igd-opregion=on" |
如果通过上述操作,核显不能输出到显示器,那么你应该尝试传统方式
方案2-传统方式(推荐)
SeaBIOS+i440fx,要求宿主机BIOS中启用CSM,且最好以Legacy Boot引导模式启动,将显卡设置成无
1 | vi /etc/pve/qemu-server/<VMID>.conf |
在直通核显一行后面添加“legacy-igd=1”,如下所示
hostpci0: 0000:00:02,legacy-igd=1
还要在首行添加以下内容(重要)
args: -set device.hostpci0.x-igd-gms=1
备用:-set device.hostpci0.addr=02.0 -set device.hostpci0.x-igd-gms=1 -set device.hostpci0.x-igd-opregion=on
或
1 | qm set <VMID> -args "-set device.hostpci0.x-igd-gms=1" |
如果还是不行,请看更多教程:
https://foxi.buduanwang.vip/yj/1602.html
https://zyyme.com/pve-igpu-passthrough.html
方案3-GVTg
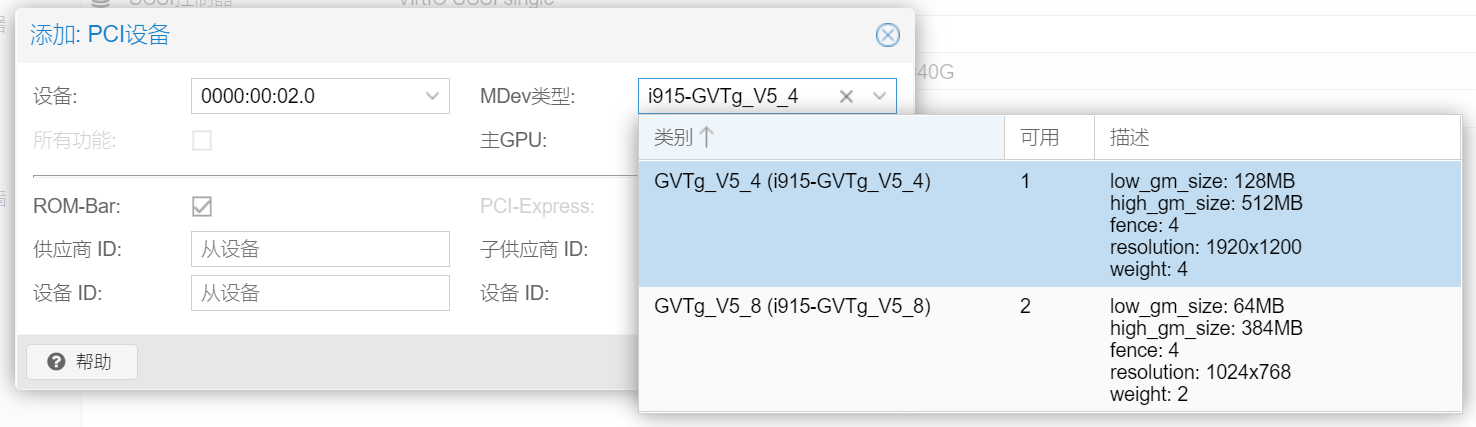
参看设备支持的类型:
1 | ls /sys/bus/pci/devices/0000:00:02.0/mdev_supported_types |
我这边i5 6500显示
i915-GVTg_V5_4 i915-GVTg_V5_8
附:GVT-g可支持数量和最多分辨率:
- i915-GVTg_V5_1 # Video memory: <512MB, 2048MB>, resolution: up to 1920x1200
可用数量- i915-GVTg_V5_2 # Video memory: <256MB, 1024MB>, resolution: up to 1920x1200
可用数量- i915-GVTg_V5_4 # Video memory: <128MB, 512MB>, resolution: up to 1920x1200
可用数量2- i915-GVTg_V5_8 # Video memory: <64MB, 384MB>, resolution: up to 1024x768
可用数量1
群晖:seabios+i440fx
1 | qm set 123 -args "-set 'device.hostpci0.addr=0x02'" |
方案4-SR-IOV虚拟化核显
坑比较多
项目地址:https://github.com/strongtz/i915-sriov-dkms
视频教程:https://www.bilibili.com/video/BV1XJ4m1T7um
注意此处使用 dkms 内核,可能需要降级内核
VGPU
https://gitlab.com/polloloco/vgpu-proxmox
https://git.collinwebdesigns.de/oscar.krause/fastapi-dls/-/packages
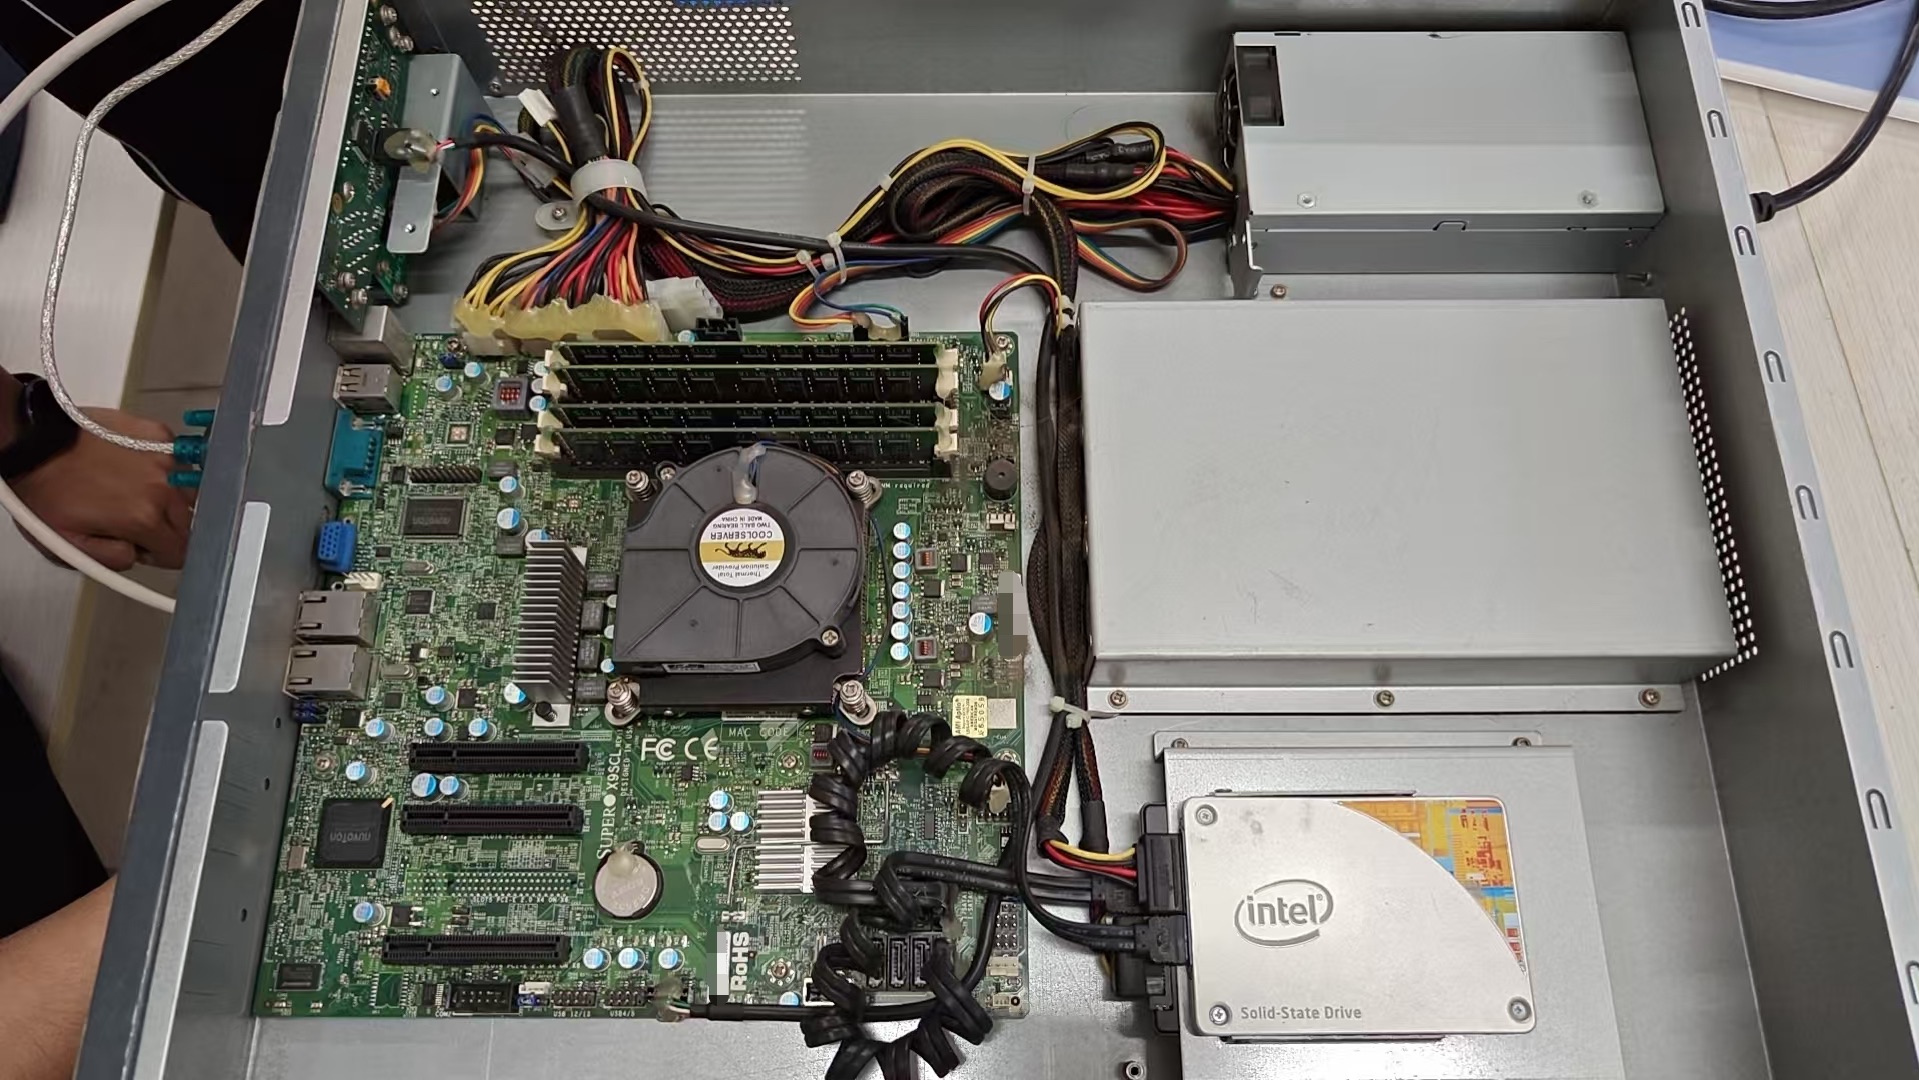
7、硬盘直通虚拟机
引用佛西博客的图
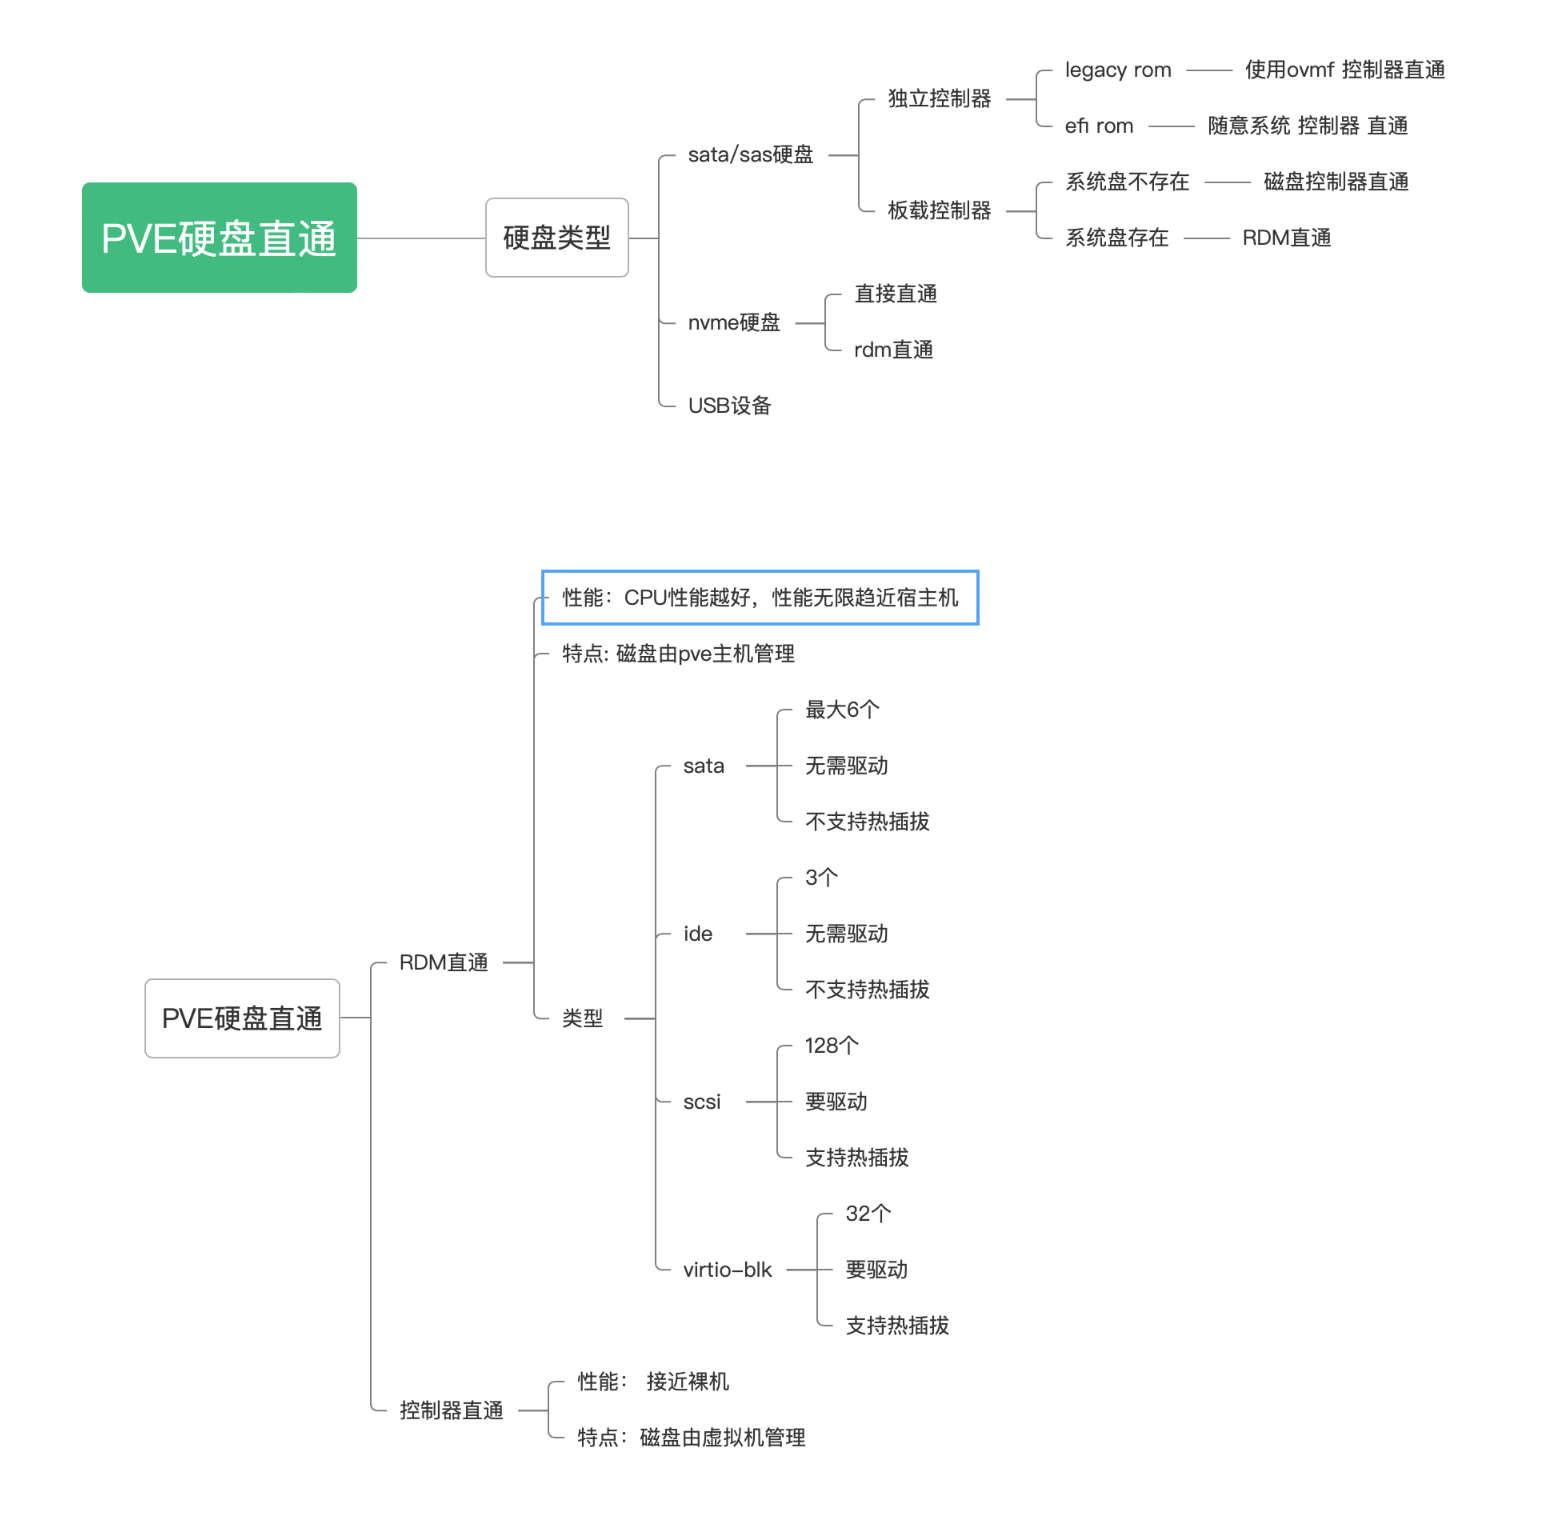
RDM磁盘直通
将单个硬盘或者分区,通过qemu进行映射到虚拟机
通过这种方式,硬盘会在虚拟机内会认为是一个qemu-hdd
相当于将某块硬盘直通给虚拟机的磁盘控制器,据说性能衰减不大,但虚拟机一般获取不到磁盘信息,容易丢失数据,NAS勿用!!!!!
RDM磁盘直通,不需要开启iommu,只能在PVE命令行中添加
列出当前的硬盘列表:
1 | ls -la /dev/disk/by-id/|grep -v dm|grep -v lvm|grep -v part |
root@pve:~# ls -la /dev/disk/by-id/|grep -v dm|grep -v lvm|grep -v part
total 0
drwxr-xr-x 2 root root 540 Apr 28 16:39 .
drwxr-xr-x 6 root root 120 Mar 3 15:52 …
lrwxrwxrwx 1 root root 13 Apr 28 16:39 nvme-eui.01000000010000005cd2e431fee65251 -> …/…/nvme2n1
lrwxrwxrwx 1 root root 13 Mar 3 15:52 nvme-eui.334843304aa010020025385800000004 -> …/…/nvme1n1
lrwxrwxrwx 1 root root 13 Apr 28 17:36 nvme-eui.334843304ab005400025385800000004 -> …/…/nvme0n1
lrwxrwxrwx 1 root root 13 Apr 28 16:39 nvme-INTEL_SSDPE2KX020T8_BTLJ039307142P0BGN -> …/…/nvme2n1
lrwxrwxrwx 1 root root 13 Mar 3 15:52 nvme-SAMSUNG_MZWLL800HEHP-00003_S3HCNX0JA01002 -> …/…/nvme1n1
lrwxrwxrwx 1 root root 13 Apr 28 17:36 nvme-SAMSUNG_MZWLL800HEHP-00003_S3HCNX0JB00540 -> …/…/nvme0n1
lrwxrwxrwx 1 root root 9 Mar 3 15:52 scsi-35000c500474cd7eb -> …/…/sda
lrwxrwxrwx 1 root root 9 Mar 3 15:52 wwn-0x5000c500474cd7eb -> …/…/sda
注意:
- nvme开头的是nvme硬盘
- ata开头是走sata或者ata通道的设备
- scsi开头是scsi设备-阵列卡raid或者是直通卡上的硬盘
直通方法
通过以下命令进行RDM直通:
1 | qm set <vmid> --scsiX /dev/disk/by-id/xxxxxxx |
注意:
–scsiX中的scsi指的是虚拟机磁盘控制器类型,也可改为–sataX、–ideX;
–scsiX中的X是你想直通到虚拟机scsi控制器的那个插孔,为整数,如0、1、2、3,注意如果是sata控制器不能超过–sata5,因为q35最多只支持6个sata ports
例如虚拟机的vmid是123,打算直通intel的一个nvme硬盘,那么你可以使用下面命令
1 | qm set 101 --scsi1 /dev/disk/by-id/nvme-INTEL_SSDPE2KX020T8_BTLJ039307142P0BGN |
如果需要取消直通,直接在浏览器网页里面删除即可
磁盘控制器直通
通常硬盘都是连接到硬盘控制器(Nvme硬盘除外,因为本来就是个PCI-E设备),由硬盘控制器管理。因此直通了磁盘控制器,就会让磁盘控制器下的所有硬盘间接直通到虚拟机
通过这种方式,硬盘会在虚拟机内会认为是一个物理磁盘,可以获得全部的磁盘属性,如SMART信息
NAS推荐这种方案,如果不想购买直通卡的话,可以将系统安装到NVME硬盘或USB外置移动硬盘中,然后直通主板SATA控制器给NAS虚拟机
直通方法
磁盘控制器直通,需要开启iommu,可以到网页中添加,q35注意勾选PCI-Express
8、网卡直通
同PCI设备直通,但请勿直通PVE管理网口的网卡
I350-T4网卡,开启PCIe桥的ACS特性,可以直通每个网口给不同虚拟机(1对1),如需要直通一个网口给多个虚拟机(1对多),不使用软交换,需要使用到SR-IOV
Intel I350-T4 SR-IOV
测试环境:
- i5-6500
- 华硕Z170-P
- Winyao I350-T4
参考:http://www.taodudu.cc/news/show-4764419.html
查询相关信息
查看网卡功能:
1 | lspci -s 01:00 -v |
root@pve:~# lspci -s 01:00 -v
01:00.0 Ethernet controller: Intel Corporation I350 Gigabit Network Connection (rev 01)
Subsystem: Device 1d1a:0000
Flags: bus master, fast devsel, latency 0, IRQ 16, IOMMU group 12
Memory at c8000000 (32-bit, non-prefetchable) [size=1M]
Memory at c8600000 (32-bit, non-prefetchable) [size=16K]
Expansion ROM at c8400000 [disabled] [size=512K]
Capabilities: [40] Power Management version 3
Capabilities: [50] MSI: Enable- Count=1/1 Maskable+ 64bit+
Capabilities: [70] MSI-X: Enable+ Count=10 Masked-
Capabilities: [a0] Express Endpoint, MSI 00
Capabilities: [100] Advanced Error Reporting
Capabilities: [140] Device Serial Number 2c-53-4a-ff-ff-05-bd-42
Capabilities: [150] Alternative Routing-ID Interpretation (ARI)
Capabilities: [160] Single Root I/O Virtualization (SR-IOV)
Capabilities: [1a0] Transaction Processing Hints
Capabilities: [1c0] Latency Tolerance Reporting
Capabilities: [1d0] Access Control Services
Kernel driver in use: igb
Kernel modules: igb01:00.1 Ethernet controller: Intel Corporation I350 Gigabit Network Connection (rev 01)
…01:00.2 Ethernet controller: Intel Corporation I350 Gigabit Network Connection (rev 01)
…01:00.3 Ethernet controller: Intel Corporation I350 Gigabit Network Connection (rev 01)
…
- Capabilities: [160] Single Root I/O Virtualization (SR-IOV):支持SR-IOV
- 如果没有这个,说明不支持SR-IOV,如果硬件确实支持,而系统没有识别,请更新网卡固件
- Kernel driver in use: igb、Kernel modules: igb:使用
igb驱动
查看网卡名称:
1 | ip l |
root@pve:~# ip l
1: lo: <LOOPBACK,UP,LOWER_UP> mtu 65536 qdisc noqueue state UNKNOWN mode DEFAULT group default qlen 1000
link/loopback 00:00:00:00:00:00 brd 00:00:00:00:00:00
2: enp6s0: <BROADCAST,MULTICAST,UP,LOWER_UP> mtu 1500 qdisc pfifo_fast master vmbr0 state UP mode DEFAULT group default qlen 1000
link/ether 38:d5:47:10:d3:4f brd ff:ff:ff:ff:ff:ff
3: enp1s0f0: <BROADCAST,MULTICAST> mtu 1500 qdisc noop state DOWN mode DEFAULT group default qlen 1000
link/ether 2c:53:4a:05:bd:42 brd ff:ff:ff:ff:ff:ff
4: enp1s0f1: <BROADCAST,MULTICAST> mtu 1500 qdisc noop state DOWN mode DEFAULT group default qlen 1000
link/ether 2c:53:4a:05:bd:43 brd ff:ff:ff:ff:ff:ff
5: enp1s0f2: <BROADCAST,MULTICAST> mtu 1500 qdisc noop state DOWN mode DEFAULT group default qlen 1000
link/ether 2c:53:4a:05:bd:44 brd ff:ff:ff:ff:ff:ff
6: enp1s0f3: <BROADCAST,MULTICAST> mtu 1500 qdisc noop state DOWN mode DEFAULT group default qlen 1000
link/ether 2c:53:4a:05:bd:45 brd ff:ff:ff:ff:ff:ff
7: vmbr0: <BROADCAST,MULTICAST,UP,LOWER_UP> mtu 1500 qdisc noqueue state UP mode DEFAULT group default qlen 1000
link/ether 38:d5:47:10:d3:4f brd ff:ff:ff:ff:ff:ff
查看网卡固件版本:
1 | ethtool -i <网卡名称> |
root@pve:~# ethtool -i enp1s0f0
driver: igb
version: 6.2.11-1-pve
firmware-version: 0.93, 0x800005fd
expansion-rom-version:
bus-info: 0000:01:00.0
supports-statistics: yes
supports-test: yes
supports-eeprom-access: yes
supports-register-dump: yes
supports-priv-flags: yes
经过查询,说是需要升级固件版本到15.x以上,但看淘宝详情页说支持SR-IOV,原来在ESXI里面也启用过,杂牌网卡不敢乱搞,所以没有升级
开启网卡设备SR-IOV
进入设备目录
PCI:
1 | cd /sys/bus/pci/devices/<PCI地址,如0000:01:00.0> |
或网卡名称
1 | cd /sys/class/net/<网卡名称,如enp1s0f0>/device |
获取最大vf数量
1 | cat sriov_totalvfs |
root@pve:/sys/bus/pci/devices/0000:01:00.0# cat sriov_totalvfs
7
回显数量是7,说明支持开启7个vf
1 | echo 7 > sriov_numvfs |
root@pve:/sys/bus/pci/devices/0000:01:00.0# echo 7 > sriov_numvfs
-bash: echo: 写错误: 无法分配内存
第二种方法
我这边没有成功,提示“无法分配内存”,需要修改modprobe,或直接修改grub启动选项,参考第二种方法:
参考:https://www.bilibili.com/video/av338824462
sr-iov在pve下的配置,主要配置有/etc/default/grub添加的内容如下,有千兆与万兆区别:
- ixgbe模块:intel_iommu=on,igfx_off iommu=pt pcie_acs_override=downstream,multifunction ixgbe.max_vfs=10 pci=realloc,assign-busses
- igb模块:intel_iommu=on,igfx_off iommu=pt pcie_acs_override=downstream,multifunction igb.max_vfs=7 pci=realloc,assign-busses
实际上,根据本文前面的配置,只需要追加:pcie_acs_override=downstream,multifunction igb.max_vfs=7 pci=realloc,assign-busses,关于pci=realloc,assign-busses:
有的老主板没有SR-IOV选项的,需要传内核参数处理PCI,例如pci=assign-busses,有些第三方光模块可能还需要pci=realloc,如果2个都需要处理,那么就写成pci=realloc,assign-busses
1 | vim /etc/default/grub |
GRUB_CMDLINE_LINUX_DEFAULT=“quiet intel_iommu=on iommu=pt i915.enable_gvt=1 pcie_acs_override=downstream,multifunction igb.max_vfs=7 pci=realloc,assign-busses”
然后更新一下grub和内核的配置,重启
遇到问题
重启后,我这边管理口的网卡名称变了,导致外部连不上PVE,还好之前给PVE装了LXDE和Firefox,通过PVE机器的Firefox重新调整了一下网卡设置才恢复,如果没有安装浏览器,需要手动更换绑定vmbr0的网卡
参考:https://wiki.debian.org/NetworkConfiguration
由于PVE没有使用NetworkManager等现代组件管理网络,而是使用ifupdown2,所以只需编辑:
1 | vim /etc/network/interfaces |
(待测)如果需要PVE支持DHCPv6,可以加上
iface vmbr0 inet6 dhcp
最终结果


另外需要注意,这个网卡的PCI地址并不是按照网卡顺序来的,需要使用以下命令查看VF对应的PF:
1 | lshw -class net -businfo |
还有,调整完VF的数量以后,还需要使用上述命令重新查看网卡PCI地址,调整各个VM的网卡PCI地址
此外,对于网卡MAC地址的固化,目前本人没有研究过,请自行百度
参考:https://foxi.buduanwang.vip/yj/561.html
四、进阶玩法
1、安装LXDE桌面环境
安装图形界面,方便管理,家庭用户建议安装
设置locale
添加 locale zh_CN.UTF-8 UTF-8,设定默认 locale 为中文zh_CN.UTF-8
1 | dpkg-reconfigure locales |
安装LXDE
1 | apt install lxde-core lxterminal fonts-noto-cjk |
安装常用软件
1 | apt install firefox-esr firefox-esr-l10n-zh-cn synaptic remmina virt-viewer |
- [x] firefox-esr:火狐长期支持版
- [x] firefox-esr-l10n-zh-cn:火狐长期支持版中文语言包
- [x] synaptic:新立得软件包管理器
- [x] remmina:远程桌面
- [x] virt-viewer:spice远程桌面客户端
- [ ] mousepad:xfce默认文本编辑器
安装中文拼音输入法
1 | apt install fcitx5 fcitx5-chinese-addons fcitx5-frontend-gtk3 fcitx5-frontend-qt5 fcitx5-module-xorg im-config |
以上的包会占用1.5GB左右空间,系统运行时内存占用不到100MB
BUG:LXDE如果安装了完整版,需要禁用connman,不然会与PVE冲突,造成断网
2
添加非root用户
1 | useradd -m user -s /bin/bash -d /home/user |
设置用户密码
1 | passwd user |
完成后重启
1 | reboot |
(不建议)安装WPS
Firefox访问:https://linux.wps.cn/ ,下载对应架构最新WPS Office For Linux Deb格式安装包
1 | cd ~/下载 sudo dpkg -i wps-office_11.1.0.11698_amd64.deb sudo apt --fix-broken install |
(不建议)安装docker
不建议在宿主机上直接安装docker,会给后面网络配置带来麻烦。
1 | apt install docker.io |
安装Portainer CE
1 | docker volume create portainer_data docker run -d -p 8000:8000 -p 9443:9443 --name portainer --restart=always -v /var/run/docker.sock:/var/run/docker.sock -v portainer_data:/data portainer/portainer-ce:latest |
设置开机自启项目
开始菜单=>首选项=>LXSession 默认应用程序=>自动启动
手动设为自动启动的程序:
- 取消
@xscreensaver关闭屏保 - 添加
@firefox-esr -kiosk -private-window https://127.0.0.1:8006自动打开Proxmox VE Web后台 - 添加
@xfreerdp /v:<RDP主机地址> /u:<RDP用户> /p:<RDP密码> /audio /gfx:AVC420 /f自动打开RDP远程桌面
(不建议)Lightdm + openbox自定义桌面环境
大小差不多,建议直接LXDE
中文环境配置,添加locale为zh_CN.UTF-8 UTF-8,设定默认 locale 为中文zh_CN.UTF-8:
1 | dpkg-reconfigure locales |
安装 Lightdm 桌面管理器及相关字体:
1 | apt install lightdm openbox fonts-noto-cjk |
安装GUI常用工具:
1 | apt install lxterminal firefox-esr firefox-esr-l10n-zh-cn synaptic |
创建用户:
1 | useradd -m user -s /bin/bash -d /home/user passwd user |
创建用户组:
1 | groupadd -r autologin gpasswd -a user autologin |
配置自动登录:
1 | vi /etc/lightdm/lightdm.conf |
1 | [Seat:*] user-session=openbox autologin-user=user autologin-session=openbox |
配置 openbox 的启动项:
1 | mkdir -p ~/.config/openbox cp -a /etc/xdg/openbox/ ~/.config/ |
https://blog.csdn.net/whyliu_/article/details/124017844
https://www.404bugs.com/details/1077554175264215040
2、PVE查找硬盘文件位置
1 | root@pve:~# pvesm path local:123/vm-123-disk-0.qcow2 /var/lib/vz/images/123/vm-123-disk-0.qcow2 |
3、内核管理
直通报错?尝试换个内核!
查看已安装内核
1 | dpkg --get-selections |grep kernel |
查看当前内核
1 | uname -a |
查找内核
1 | apt search pve-kernel|grep pve-kernel- |
1 | apt-cache search linux | grep 'PVE Kernel Image' |
安装内核
1 | apt install pve-kernel-5.13.19-4-pve |
查看当前系统内核启动顺序
1 | grep menuentry /boot/grub/grub.cfg |
修改内核启动顺序
1 | nano /etc/default/grub |
把默认的GRUB_DEFAULT=“0”改为
GRUB_DEFAULT=“Advanced options for Proxmox VE GNU/Linux>Proxmox VE GNU/Linux, with Linux 5.13.19-4-pve”
更新引导并重启
1 | update-grub reboot |
卸载内核
1 | bash -c "$(wget -qLO - https://github.com/tteck/Proxmox/raw/main/misc/kernel-clean.sh)" |
4、虚拟内存
创建SWAP文件
创建一个16G的swap,bs * count =16G
1 | dd if=/dev/zero of=/swapfile bs=1G count=16 |
注意,这个swapfile存放在根目录下
配置安全的权限
1 | chmod 0600 /swapfile |
格式化成swap
1 | mkswap /swapfile |
挂载swap
1 | swapon /swapfile |
验证
1 | free -h |
Swap策略
临时调整swap策略
方法1:
1 | [root@PVE ~]# sysctl vm.swappiness=10 vm.swappiness = 10 |
方法2:
1 | [root@PVE ~]# echo 10 > /proc/sys/vm/swappiness |
永久更改swappiness值
要想永久调整的话,需要在/etc/sysctl.conf修改,加上:
vm.swappiness=10
验证
1 | [root@PVE ~]# cat /etc/sysctl.conf vm.swappiness=10 |
激活设置
1 | [root@PVE ~]# sysctl -p |
5、PXE网启文件制作
这里只记录文件制作,具体怎么使用网启、怎样配置DHCP服务器,不在本篇暂不讨论,最多附一下编译 iPXE 所用到的软件包:
1 | sudo apt install gcc binutils make perl mtools mkisofs syslinux liblzma-dev isolinux |
参考:https://github.com/morph027/pve-iso-2-pxe
首先需要准备一台 Linux 机器,建议使用 Debian 环境
获取脚本:
1 | wget -O pve-iso-2-pxe.sh https://gh.xrgzs.top/https://raw.githubusercontent.com/morph027/pve-iso-2-pxe/master/pve-iso-2-pxe.sh chmod +x pve-iso-2-pxe.sh |
安装相关软件包:
1 | sudo apt install cpio file zstd gzip genisoimage |
下载最新ISO:
http://mirrors.ustc.edu.cn/proxmox/iso/
以ISO文件路径为参数,运行 pve-iso-2-pxe.sh 脚本:
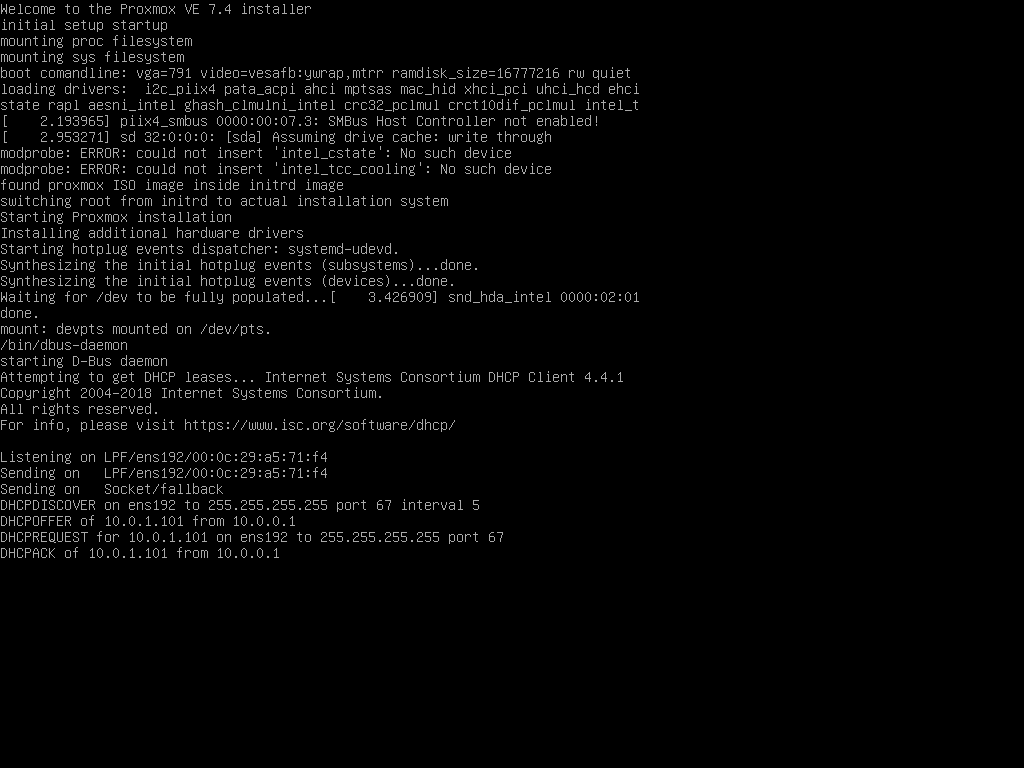
1 | ┌──(user㉿kali)-[~/桌面] └─$ bash pve-iso-2-pxe.sh proxmox-ve_7.4-1.iso ######################################################################################################### # Create PXE bootable Proxmox image including ISO # # # # Author: mrballcb @ Proxmox Forum (06-12-2012) # # Thread: http://forum.proxmox.com/threads/8484-Proxmox-installation-via-PXE-solution?p=55985#post55985 # # Modified: morph027 @ Proxmox Forum (23-02-2015) to work with 3.4 # ######################################################################################################### Using proxmox-ve_7.4-1.iso... extracting kernel... extracting initrd... adding iso file ... 2193089 块 Finished! pxeboot files can be found in /home/user/桌面. |
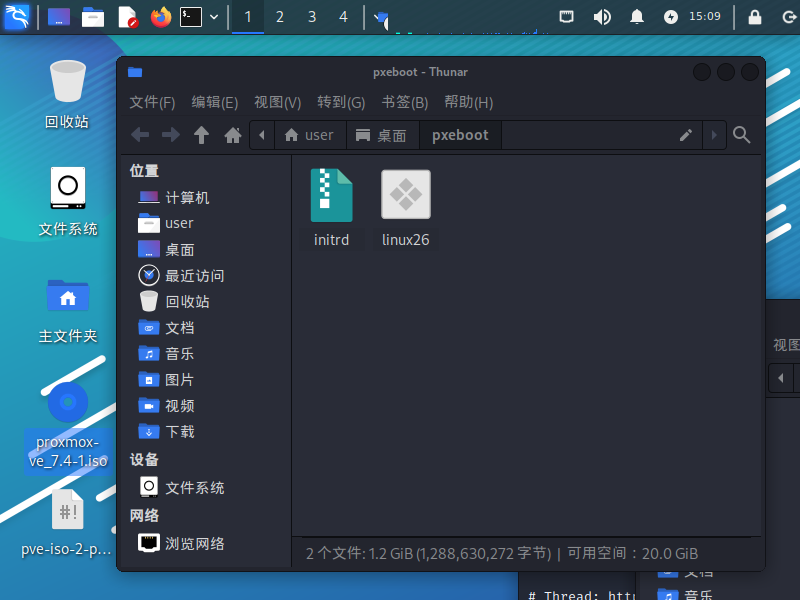
此时,ISO文件的同级目录会创建一个 pxeboot 文件夹,里面包含 linux26 和 initrd 两个文件
我们将它们上传到文件下载服务器,然后使用以下 iPXE 脚本进行引导:
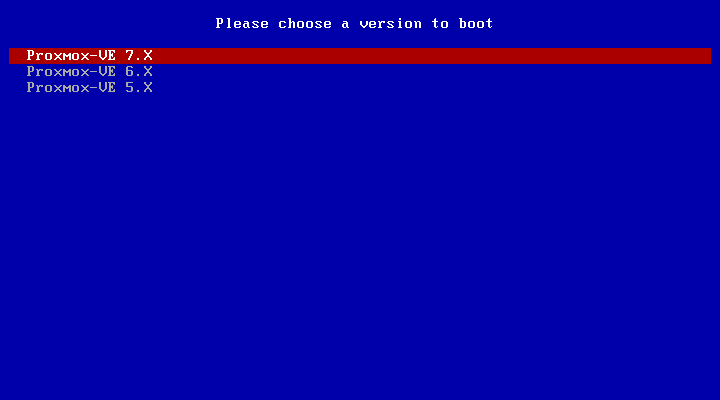
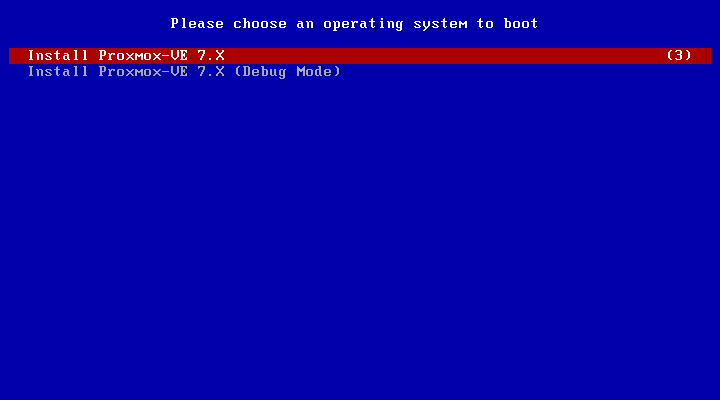
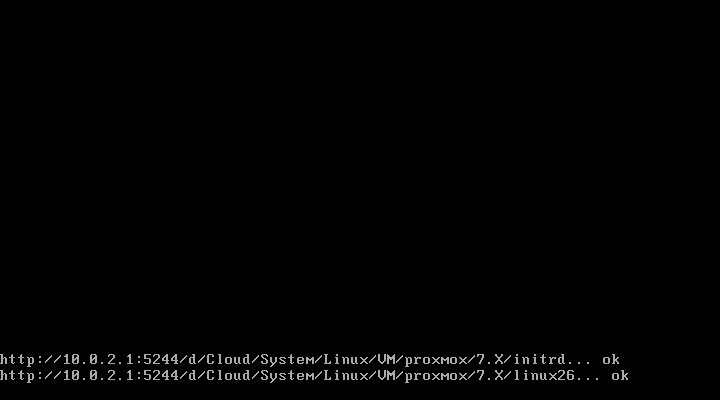
1 | #!ipxe dhcp set webserver http://10.0.2.1:5244/d/Cloud/System/Linux/VM menu Please choose a version to boot item 7.X Proxmox-VE 7.X item 6.X Proxmox-VE 6.X item 5.X Proxmox-VE 5.X choose --default 7.X --timeout 5000 target && set pveversion ${target} menu Please choose an operating system to boot item normal Install Proxmox-VE ${pveversion} item debug Install Proxmox-VE ${pveversion} (Debug Mode) choose --default normal --timeout 5000 target && goto ${target} :debug initrd ${webserver}/proxmox/${pveversion}/initrd chain ${webserver}/proxmox/${pveversion}/linux26 vga=791 video=vesafb:ywrap,mtrr ramdisk_size=16777216 rw quiet initrd=initrd splash=verbose proxdebug goto end :normal initrd ${webserver}/proxmox/${pveversion}/initrd chain ${webserver}/proxmox/${pveversion}/linux26 vga=791 video=vesafb:ywrap,mtrr ramdisk_size=16777216 rw quiet initrd=initrd splash=silent goto end :end |
注意要点:
-
推荐文件服务器使用 Alist 本地挂载,尽量别用 Tiny PXE Server 的龟速 HTTPd(有些时候比 TFTP 还慢);
-
不要使用 HTTPS 协议的文件服务器或 HTTPS 协议的网盘的转链,如有必要必须使用 HTTPS,请在编译 iPXE 前编辑
ipxe/src/config/general.h,将#undef DOWNLOAD_PROTO_HTTPS改为#define DOWNLOAD_PROTO_HTTPS; -
路径中请勿包含空格;
-
请勿使用引号
"对启动参数进行引用(原文中的脚本是无法使用的,一定要写死) -
如果一直卡在
............,或提示Operation not supported,说明 iPXE 下载错误(通常initrd文件在 1GB 以上,下载那么快肯定不正常),请检查服务器是否被正确搭建,iPXE 是否正确开启 HTTPS 支持
效果展示:
6、添加温度、功耗、硬盘等信息显示
来自:https://www.right.com.cn/forum/thread-6754687-1-1.html
一键执行
1 | (curl -Lf -o /tmp/temp.sh https://raw.githubusercontent.com/a904055262/PVE-manager-status/main/showtempcpufreq.sh || curl -Lf -o /tmp/temp.sh https://mirror.ghproxy.com/https://raw.githubusercontent.com/a904055262/PVE-manager-status/main/showtempcpufreq.sh) && chmod +x /tmp/temp.sh && /tmp/temp.sh remod |
没有显示功耗的,请执行下面的命令安装依赖,请确保安装成功,就是最后的一行的输出,必须为 “成功!” 才表示安装成功了。
1 | apt update ; apt install linux-cpupower && modprobe msr && echo msr > /etc/modules-load.d/turbostat-msr.conf && chmod +s /usr/sbin/turbostat && echo 成功! |
如果你已经用别人的脚本之类的修改过页面,请先用下面命令先回复官方设置之后,才可以运行本脚本:
1 | apt update apt install pve-manager proxmox-widget-toolkit --reinstall rm -f /usr/share/perl5/PVE/API2/Nodes.pm*bak rm -f /usr/share/pve-manager/js/pvemanagerlib.js*bak rm -f /usr/share/javascript/proxmox-widget-toolkit/proxmoxlib.js*bak |
另外:每次pve升级之后都需要执行一次脚本,因为升级后PVE会自己还原文件
所以我是不会改的
7、关闭KSM内存共享
1 | systemctl disable –now ksmtuned echo 2 > /sys/kernel/mm/ksm/run |
8、修改CPU调度
1 | apt install cpufrequtils cpufreq-info # performance 性能模式,将 CPU 频率固定工作在其支持的较高运行频率上,而不动态调节。 # userspace 系统将变频策略的决策权交给了用户态应用程序,较为灵活。 # powersave 省电模式,CPU 会固定工作在其支持的最低运行频率上。 # ondemand 按需快速动态调整 CPU 频率,没有负载的时候就运行在低频,有负载就高频运行。 # conservative 与 ondemand 不同,平滑地调整 CPU 频率,频率的升降是渐变式的,稍微缓和一点。 # schedutil 负载变化回调机制,后面新引入的机制,通过触发 schedutil sugov_update 进行调频动作。 cpupower -c all frequency-set -g ondemand systemctl restart cpufrequtils |
9、开启LXC容器IPv6分配
1 | vi /etc/sysctl.conf |
1 | # 加入以下内容 net.ipv6.conf.all.accept_ra=2 net.ipv6.conf.default.accept_ra=2 net.ipv6.conf.vmbr0.accept_ra=2 net.ipv6.conf.all.autoconf=1 net.ipv6.conf.default.autoconf=1 net.ipv6.conf.vmbr0.autoconf=1 |
1 | sysctl -p |
未完待续…